


The product we used:
What are obanyaki?
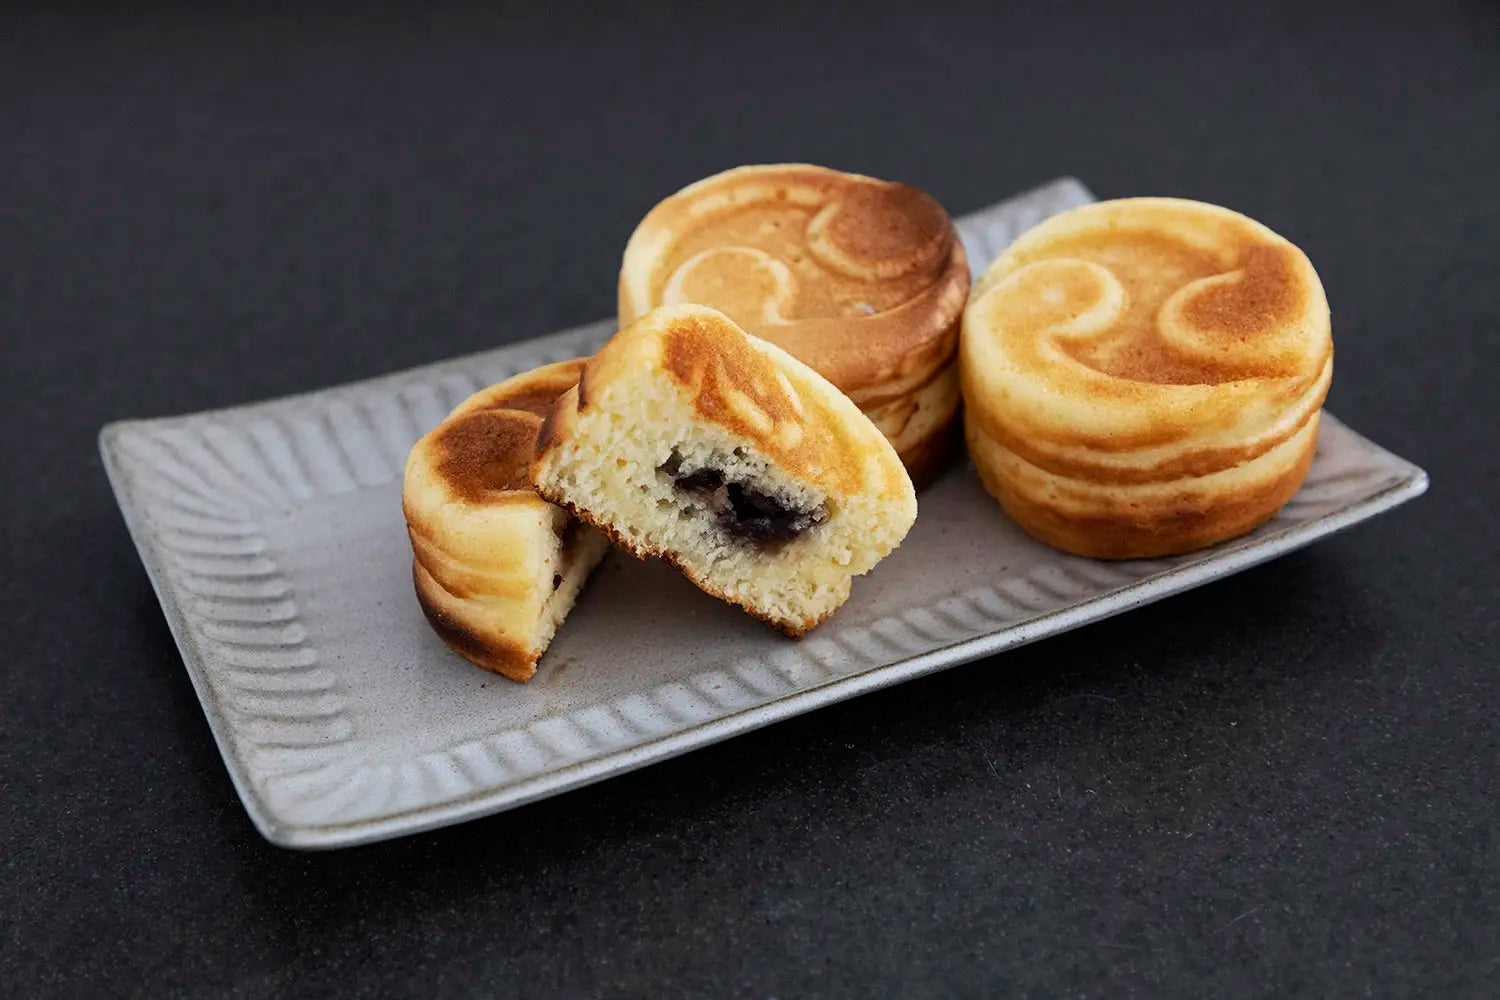
Obanyaki are small, round or oval-shaped snacks or desserts that are typically filled with sweet fillings, similar to Taiyaki. They are made by pouring batter into a special mold and adding ingredients like red bean paste, custard, or other sweet fillings before closing the mold and cooking until they are golden brown and slightly crispy on the outside.
Obanyaki are a popular treat in Japan and are often enjoyed as street food or snacks from vendors at festivals and events.
And now you can make your own obanyaki and start a Japanese festival right at home.
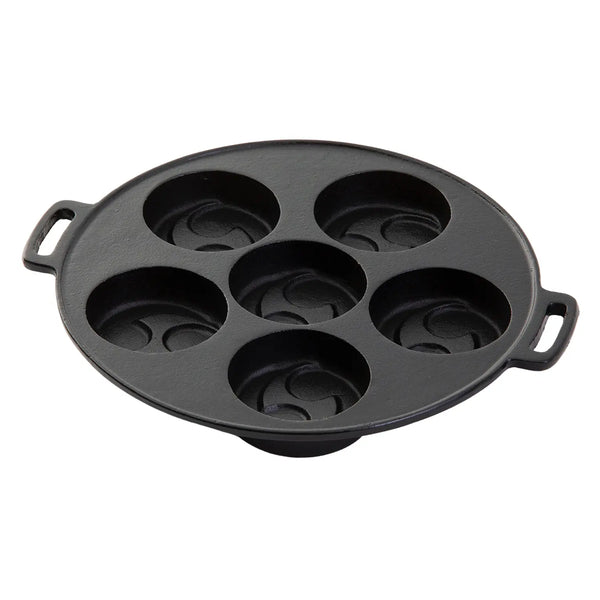
The Obanyaki Pan from Gifu-Asahi

Meet the Gifu-Asahi Obanyaki Pan. It's 9.2 inches and 4 pounds of cast iron and good times. With six cooking slots, everybody can take a bite of their hot and steaming traditional Japan lava donuts and burn the inside of their mouths together.
I see that look in your eyes. You're thinking, "Micah, by the looks of things, the spatula I use to flip my pancakes and omelets won't fit inside those slots. How can I possible flip those delicious looking Japanese treats?"
Friends, the answer is simple: Use a stick.
How to Cook Obanyaki Like a College-Aged Obanyaki Peddler at a Street Festival

No, seriously, use a stick. Ask your Japanese mother-in-law. She'll tell ya.
Okay, I can see you're still skeptical, so let me give you a recipe.
Ingredients
- Pancake mix
- Milk
- Egg
- Anko or custard (for filling)
- Butter or oil
1. Prepare your batter

Put your pancake mix into a bowl and then add the egg and milk. Use a whisk to gently mix the ingredients.
2. Heat the Pan
Spread oil on the pan and preheat. Make sure you get that sucker nice and hot (when cooking with vegetable oil, they recommend waiting until the oil starts to smoke) or else you're gonna have problems. Like your other cast iron pans, you can heat it with gas or induction heating cooktops. However, we recommend cooking with gas direct heating type for the perfect, evenly cooked crust.
3. Place a Bit of Batter in Pan and Add Filling

Once your pan is preheated, place a little bit of batter in each of the cooking slots. If you plan to add an anko or custard filling, we recommend adding just enough batter to cover the bottom.
Take a glob of your favored filling and place it lovingly in the middle of the batter. How much filling? Go with your gut. Our experience is that the batter puffs up quite nicely, but every batter is different. Experiment and see how much filling is right for you.
4. Top Off With A Bit More Batter and Turn Heat to Low

After adding the filling, cover it up with a bit more batter. Again, don't add too much because these bad boys are gonna inflate like little pancake balloons. After topping off the obanyaki, turn heat to low. You don't want to burn your obanyaki babies, do you? Just take it nice and easy. You can't rush perfection.
5. Take a Peek, Then Flip

Here's where the stick comes in handy. You can use a toothpick, chopsticks, etc. After the batter puffs up, you can glide your stick between the obanyaki and the pan. If the pan was oiled and preheated well, and the crust is cooked to a nice golden brown, you won't have any sticking or mess.
You can use your stick to slowly flip the obanyaki over. Push the stick about half-way down the edge of the obanyaki and pull the obanyaki up gently with the tip of the stick. Check out that cool Tomoe pattern!
Once you get some experience, you'll be able to work more quickly and with less mess.
6. Finish Cooking and Serve

Cook the other side to a golden brown and then place it on a plate. Congratulations, you are now an obanyaki peddler. Let the festival begin!
After-Festival Clean Up
Once your customers/friends have eaten themselves into an obanyaki coma, it's time to clean up.
- Don't store any leftover obanyaki in the pan. That may cause it to rust.
- Don't wash in a dishwasher. That could cause the seasoning to come off.
- If any food gets stuck to the pan, you can soak the pan in hot water for a short time to remove it.
- Cast iron will rust easily, so as soon as possible after cooking, clean it off with a soft sponge and water and then dry thoroughly before applying oil to the surface again. Gifu-Asahi also recommends wrapping the pan in newspaper if you have some.
- The pan is still usable even if it rusts, but if you're worried about the rust, you can remove it with a hard brush. After removing it, make sure to get it completely dry and then apply some oil to the surface while it's warm.
Other Uses

The Gifu-Asahi Obanyaki Pan can be used for more than just obanyaki, of course. You can fry eggs, cook small bento wieners, or simply make special pancakes for your picky kids. They'll love the tomoe pattern.
Let us know how you use your obanyaki at home in the comments below!


