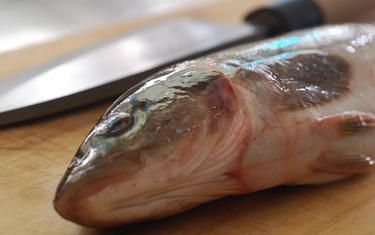
As with a global trend of pursuing healthy food, more and more people now eat raw fish, even those who has been avoiding it. Not a few people would be impressed by awesome sushi or sashimi and wish to cook them by themselves.
However, it is actually quite difficult to prepare a fish. So we would like to show you in our serial blog posts how to prepare a fish to make sashimi.
The topic of the first post is “A Basic Process to Prepare a Fish”.
A right order to prepare fish

You might think sashimi is just a slice of fish, but you need several steps in preparation.
There are mainly 3 steps.
- Removing head and guts (Washing)
- Removing skin and bones
- Slicing and Serving
There are further some tips in each step, and after all these steps you can make awesome sashimi with freshness.
Further important points are insight to choose good fresh fish, “Ikejime” process (draining blood from a live fish to keep it fresh), and management skill to prevent bacteria or parasite propagation.
We would like to show you the very first basic step ― Removing head and guts (Washing).
Washing
The purpose of this process is removing scales and dirt on fish surface as well as guts and blood which cause bad smell or decay.
As time goes, the risk of bacteria/parasite propagation and food poisoning increases. This is why fish guts should be removed as soon as possible.
1. Removing scales

Most fish have scales on the surface, which are very hard and mostly impossible to eat. Scales must be removed.
To remove them, rub a fish from head to tail with a knife edge. You can use a fish scaler to do this more quickly and safely.
You should be careful not to cut fingers or hands with sharp fins.
It is recommended to wash fish in running water in order to prevent scales scattering here and there.
2. Removing head

After removing scales, cut off the head and backbone. If the fish is small, petit knives would work, but if it is as big as a sea bream, using kitchen knives such as Deba knives is advised.
You can see a right angle to cut off the head in the picture below.

The head and “Kama” (meat cut from around gills) can be used as broth for soup or aqua pazza. If the fish is big enough with enough meat, even only Kama merely grilled with salt, pepper and herb will be a great dish.

3. Removing guts

Split the fish belly from anus to head with a knife edge. Be careful to use only the edge not to hurt the guts, which might stain the cutting board or spoil fresh meat around.
4. Removing dark flesh

Dark flesh is a muscle along backbone with bloody color, the source of stamina for fish to keep swimming in the sea. This dark flesh is rich in nutrition, but tastes blood, and most people don’t like it, especially for sashimi. So, make a few small cuts along dark flesh and remove it with a teeth brush (Professional chefs use a specialized bamboo brush called “Sasara”).

Doing this in running water would be easier. When you remove it all, move on to the next step.

5. Wipe off water

Wipe off water on the fish, and then Washing process is completed. Make sure there is no water left; otherwise, the fish meat will get watery or go bad quickly.
Washing process is a must not only when you make sashimi or sushi but also cook boiled fish or salty grilled fish. For salty frilled fish, you may need to slice a fish down its back (or belly) and for boiled fish, you may need to cut a fish into 2 or 3 slices.
We used a fresh Atka mackerel as an example, this process will apply to most fish with similar shape such as horse mackerel, mackerel, sea bream and chicken grunt.
We will show you how to cut a fish into 3 slices in the next blog post.


