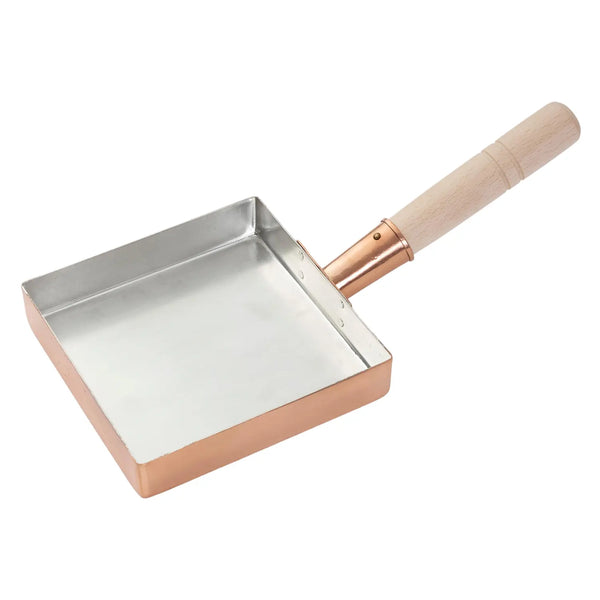
The product we used:
A Simple Yet Versatile Food
The first food I learned to cook as a little boy was scrambled eggs. After I learned to make scrambled eggs, I ate scrambled eggs so often that my mom started to worry about my health (as you all know, the experts have been somewhat undecisive about the health effects of eggs).
Later in life, I learned how to make higher-quality scrambled eggs using Gordon Ramsey's famous recipe. It's amazing what you can do with just a simple egg.
If you've watched anime or have eaten a bento, you might have seen or eaten some eggs called tamagoyaki. Tamagoyaki is a Japanese rolled omelette that's both flavorful and visually appealing. It's a popular Japanese culinary staple, often enjoyed as part of a traditional breakfast, a bento box, or as a side dish.
In this recipe, I'll teach you how to make tamagoyaki. To achieve the signature rectangular shape and layers of this classic dish, my wife used the Kanto Style Copper Tamagoyaki Square Omelette Pan from EBM.
After you master this simple-yet-elegant egg dish, you'll be able to impress your friends and worry your mom.
Ingredients:
- 3 large eggs
- 1 tablespoon sugar
- 1 tablespoon soy sauce
- Vegetable oil for greasing the pan
Instructions:
1. Crack and Whisk Eggs:

- Crack the eggs into a bowl and whisk them well until they are fully combined.
2. Add Sugar:

- To the whisked eggs, add the sugar. Mix everything thoroughly until the sugar is completely dissolved.
3. Add Soy Sauce:

- To the egg and sugar mixture, add the soy sauce. Mix everything thoroughly until the soy sauce is fully incorporated into the mixture.
4. Heat the Tamagoyaki Pan:

- Place your tamagoyaki pan (you bought the Copper Tamagoyaki Square Omelette Pan, right?) on the stovetop and heat it over medium-low heat. If your tamagoyaki maker is not non-stick, you may need to lightly grease it with vegetable oil using a paper towel.
5. Cook the First Layer:

- Pour a thin layer of the egg mixture into the tamagoyaki maker, just enough to cover the bottom. Allow it to cook until the edges start to set but the center is still slightly runny. You can use chopsticks or a spatula to gently lift the set edges and let the uncooked egg flow underneath.
6. Roll the First Layer:
- Once the first layer is partially set, use a spatula to roll it from one end to the other. Push the rolled layer to the side of the pan.
7. Add More Egg Mixture:

- Pour another thin layer of the egg mixture into the pan (remember, it's the Copper Tamagoyaki Square Omelette Pan from EBM), making sure it flows under the rolled layer. Allow it to cook until the edges set again.
8. Roll and Repeat:

- Roll the newly cooked layer over the existing roll, creating a thicker roll. Continue this process, adding more egg mixture and rolling until you've used up all the mixture. You should have a rectangular-shaped omelette with multiple layers.
9. Finish Cooking:

- Once you've used up all the egg mixture, continue to cook the rolled omelette, turning it occasionally to ensure even cooking. Cook until it's golden brown on the outside and firm on the inside. Congratulations, you now have a fluffy egg brick.
10. Remove and Slice:

- Carefully remove the tamagoyaki from the pan and let it cool for a minute or two. Slice it into bite-sized pieces.
11. Serve:

- Transfer the sliced tamagoyaki to a plate and serve it as a delicious side dish or a component of a bento box.
Tamagoyaki is often garnished with thinly sliced scallions or a sprinkle of bonito flakes. Feel free to customize it to your taste by adding ingredients like cooked vegetables or crab meat to the egg mixture before cooking. Enjoy your homemade tamagoyaki and don't forget to show it to your mom!


